


Install OpenConnect in Ubuntu
This post explains how to install OpenConnect and configure it on Ubuntu. OpenConnect is a VPN client created to support Cisco’s AnyConnect SSL VPN. Later it added the support for Juniper Networks or Pulse Secure.
OpenConnect is not officially supported by Cisco Systems and Juniper Networks. The OpenConnect installation on Ubuntu is very simple and straightforward as it is available on the Ubuntu base software repository. You can install it on the following single command.
Installation:
sudo apt install openconnect network-manager-openconnect network-manager-openconnect-gnome
This command installs OpenConnect on your Ubuntu machine and it is available on your network manager. You can open this VPN client from the Network option available in the System Settings. Please refer the screenshot below:
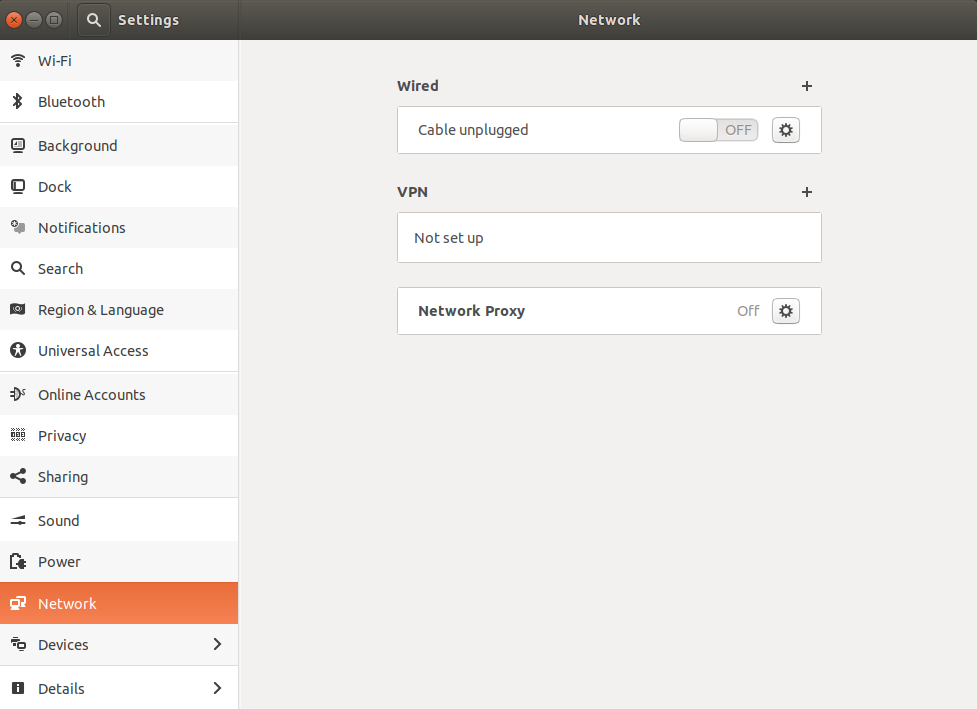
Then click the Plus (+) button on the right-hand side of VPN section. You will get a popup window like below once you click the plus button:
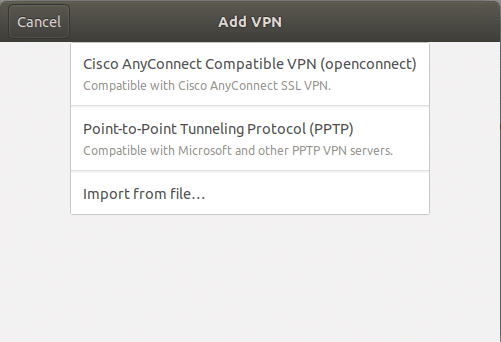
Choose the “Cisco AnyConnect Compatible VPN (AnyConnect)”, then you will get a new VPN configuration window.
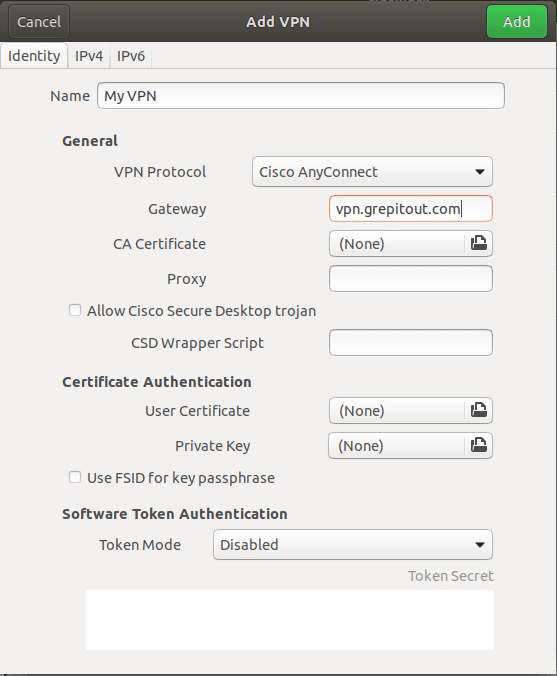
Please provide the desired name for your VPN (I have set “My VPN” in the screenshot) in the Name section and choose the VPN Protocol. There are two protocols available in it. One is “Cisco AnyConnect” and the other is “Juniper/Pulse Network Connect”. Select the protocol according to your VPN. Then provide your VPN gateway on the Gateway section and click save.
Click the ON/OFF switch to enable the VPN. It is also available in the Network Manager section available on your Ubuntu panel.

Once the VPN is enabled, a new window will appear to provide your login details. Enter your username and password and click Login.
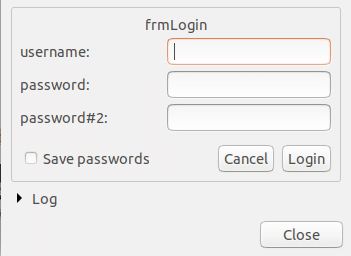
In this screenshot, you can see that two password section. It is because I have enabled 2-factor authentication on the VPN server.
That’s it!
Also Read: Install Pulse Secure VPN Client on Ubuntu, CentOS
If you like this post and wish to receive more articles from us, please like our FB page: Button
Your suggestions and feedbacks will encourage us and help to improve further, please feel free to write your comments.
For more details on our services, please drop us an E-mail at [email protected]


[…] Install OpenConnect in Ubuntu […]
On Ubuntu 18.04 I don’t see password#2 on the login splash page after I select TOTP. Am I missing any steps?
Awesome! works just great. Thanks.
[…] I tried to install OpenConnect VPN client for Ubuntu with these instructions, but this is all I see….there’s no option to setup a PA GlobalProtect VPN […]